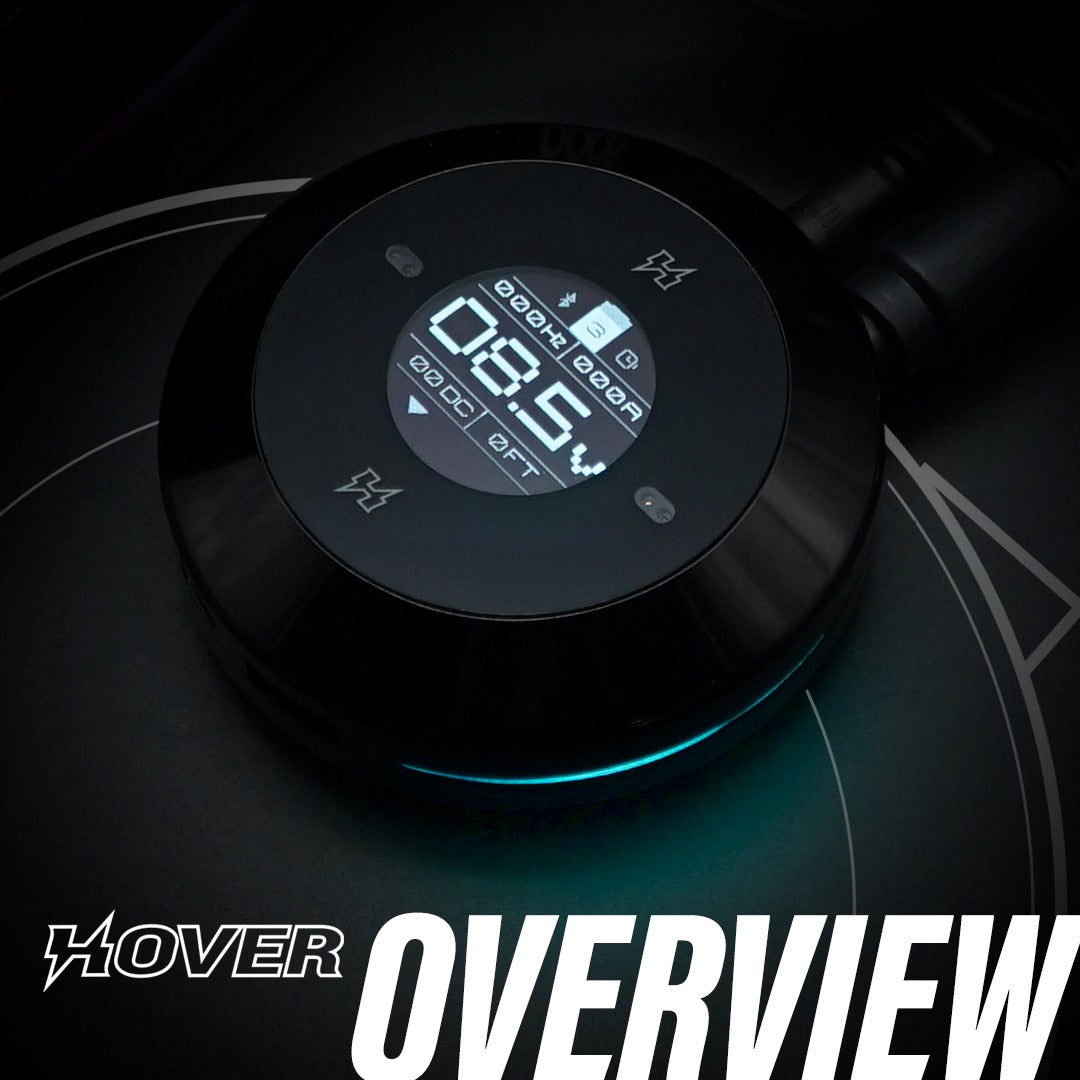
FK Irons® is always ahead of the curve, designing and putting advanced technology machines into the hands of tattoo artists. On a push for safer devices that reduce cross-contamination and at the same time offer helpful features for tattoo artists, we've created the Hover® touchless power supply.
A feat of engineering, you can control your voltage on the Hover using hand gestures, which are read by motion sensors. Our ever-expanding menus will soon be updatable with firmware to offer you more control of your tattoo machine and features that will help your business grow. So what can you do with the Hover?
Hover Features:
In this FAQ on the Hover power supply, we'll start with an overall framework, so you know how to approach the device. Think of these as the rules that the Hover lives by for your interaction with it.
- The Hover is not a power bank; it must be plugged into an electrical socket using a quality cord that supplies the proper voltage.
- The Hover is truly touchless. Touching the screen will produce no action, as the Hover was not designed to respond to touch in order to reduce cross-contamination.
- Wave your hand or fingers over the motion sensors on left and right of the screen to use the Hover.
- The last icon/feature that was highlighted on the screen is the feature that will be activated.
- The Hover will "beep" or vibrate as its way to say "yes" or give you positive feedback.
- Scrolling through the menu is unidirectional (one way). If you passed the menu accidentally, just keep your fingers positioned until it cycles back to the menu that you had intended to reach.
- Use clear barrier film. Colored barrier film will affect the sensors.
About the Hover's default screen
The default home screen is the voltage, displayed in large numbers. You have a few different options for your home screen preference, such as viewing the power in Hertz, or viewing the timer in large with the voltage below and in a smaller font. You can change these in the screen configuration menu.
Q: How do I know if the Hover is on?
A: When you plug the Hover in, the blue and purple lights at the base are instantly lit. However, when you place one closed palm over the sensors, it will activate and be ready to use. Only then will the lights "hover," glowing brightly, then slowly dimming in succession to indicate it is ready and working.
Q: How do I access the Hover's menu and make a change or selection?
A: Make the "peace sign" with your fingers and place them above the two motion sensors.
To cycle through the menu items, keep your fingers above the sensors without moving until the Hover cycles to the menu item you wanted to access.
Remove your fingers quickly when you see the menu you want, otherwise it will continue to cycle through the menus. The menus always cycle forwards.
To make a change or selection within the menu item that you wanted, use either the left or right motion sensors to select one of the icons, which represents the feature you want.
Q: Why does my Hover keep locking the screen?
A: The first menu "option" is to lock the screen. Simply keep holding your two fingers in a "peace" sign to move past the lock screen.
Q: How do I keep the Hover from accidentally changing the voltage?
A: Lock the Hover by placing two fingers in a "peace" sign over the two motion sensors, the same way you would access the menu items. The first screen that pops up is actually the lock screen.
To unlock it, swipe over both motion sensors in any direction.

Q: How do I save my voltages as a preset or delete a preset?
A: Hold both fingers over the motion sensors until it cycles to the next screen which displays a number encased in a white box and at the bottom reads: "BANK."
Release your fingers over the motion sensors to stop the cycling through the menus.
In two seconds, a square save icon, a trash icon and an "x" will appear.
Move the cursor using the motion sensors to the left or right until the save icon or the delete icon is highlighted and remove your fingers from the motion sensor.
If you wanted to save your current voltage settings, when you remove your hand from the motion sensor after having chosen the save icon, the Hover will beep in two seconds to confirm that it has saved.
If you wanted to delete a bank, remove your hand from the motion sensor after having chosen the delete icon and the Hover will beep to confirm it deleted that bank.
You can save up to 9 of your favorite banks. If you delete a bank anywhere in the middle, the following bank preset will take over. For instance: if you no longer like preset number 5 and you delete it, whatever was your 6th preset will now become your 5th.

Q: How do I change the jack dedicated to either my machines or footswitch?
A: Yes, this implies that you can switch the control of the two ports. Firstly, access the Port Configuration Screen (read above for how to access the menu features).
This menu displays pairings of icons of a foot and a lightning bolt. The foot represents a foot pedal and the lightning bolt represents your tattoo machine.
The order of these are important. If you notice, you have three options:
Toggle between your three options using the motion sensors on the right or left. When the combination you want is highlighted, remove your hands from the sensors. In two seconds, the Hover will beep to confirm.

Q: The Hover's main screen is upside down! How do I flip it back?
A: Hold two fingers over the motion sensors in a "peace" sign and cycle to the menu with A and B. Note the direction of the two ports in the icons. A has the ports on the bottom, whereas the B icon has them at the top.
Use the left or right motion sensors to toggle between the two options. Remove your hand from the motion sensors' view when the one you want is highlighted. In two seconds the Hover will "beep" in confirmation and change the screen orientation.

Q: How do I change my default screen?
A: You can easily choose your default screen. Cycle through the menus until you reach one called "SCREEN MODE." Here you have four choices:
- Pro
- Volts
- Hertz
- Timer
Many tattoo artists like the Timer mode. At the bottom of the Timer view it still states the voltage.
Notes about using the Timer mode: If you set the Timer view as your default for your tattoo session, one of your main menu options changes!
Your second menu is the timer menu so you have easy access to Pause, Stop or Start your Timer sessions.
So, to start or stop the session, hover your two fingers over the motion sensors to access the menu for the Timer controls.
Also note that you don't have to activate the Timer view to time a tattoo session.
You can set any of the other three view options mentioned above and still use the Timer, which has it's own dedicated menu. You simply cycle through the menus until you reach the Timer menu and start and stop it from there. As soon as you remove your hands from the motion sensor, the screen will return to the default view you've chosen.
HANDY TIPS
to keep your Hover running smoothly
- Keep the Hover safe by using approved barrier film. Typical adhesives could interfere with sensors.
- Use only FDA-approved cold sterilization solutions for disinfection. Avoid scratching sensor windows.
- NOT AUTOCLAVABLE.
